NestJS - Swagger를 사용합시다.
— NestJS, swagger — 5 min read
나는 swagger를 꽤 좋아하는 편이다.
귀찮은 문서 작업을 자동화해 주는 데다가, API 테스트도 쉽게 할 수 있다.
프로젝트 첫 시작에서 멈춰있게 되는 일반 문서와 달리 관리가 편하고, 프론트 분들과 협업하기 딱 맞는다는 생각이 든다.
그래서 나는 프로젝트를 시작할 때, swagger를 도입하자고 적극 주장하는 편이다.
swagger를 사용하는 방법에는 크게 2가지가 있다.
하나는 YAML 파일이나 JSON 형태로 정의하는 것이고,
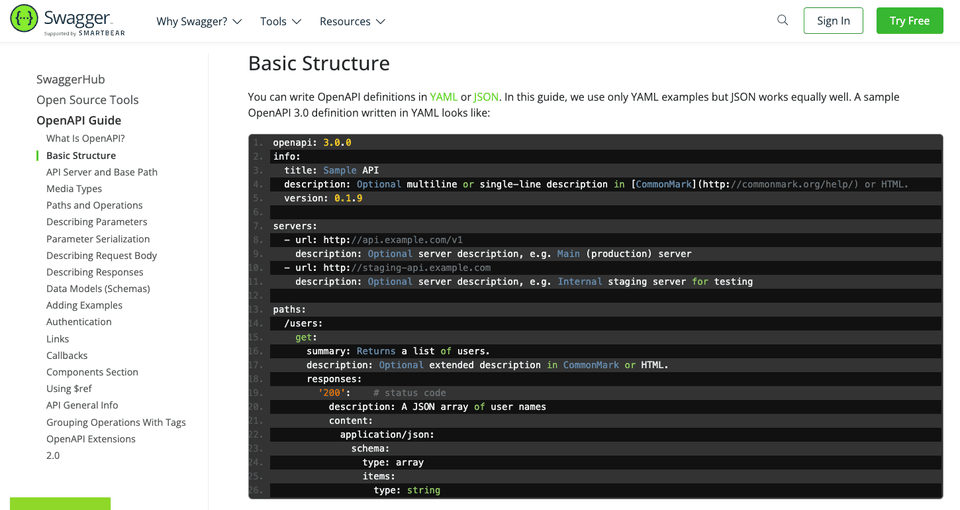
하나는 사용하는 프레임워크 단에서 swagger를 지원하는 라이브러리를 사용하는 것이다.
그 중 나는 가독성이나 유지보수 측면에서 후자를 선호하며, 이 아래부터는 NestJS에서 Swagger를 다루는 방법을 간단히 소개한다.
패키지 설치
yarn add @nestjs/swagger이 글에서 사용하고 있는 @nestjs/swagger 버전은 7.2.0 이다.
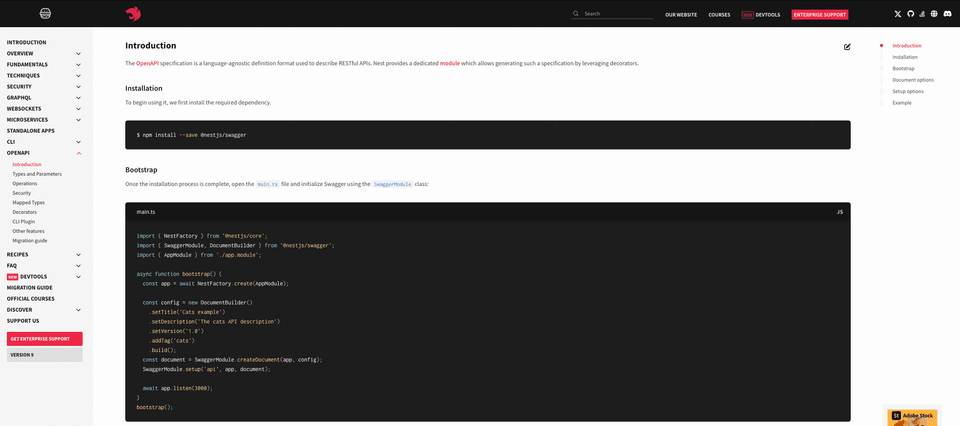
NestJs 설정
main.ts
import { NestFactory } from '@nestjs/core';import { AppModule } from './app.module';import { Logger } from '@nestjs/common';import { DocumentBuilder, SwaggerCustomOptions, SwaggerModule } from '@nestjs/swagger';import { ValidationPipe } from '@nestjs/common';
async function bootstrap() { const app = await NestFactory.create(AppModule);
...
// swagger 설정 const swaggerConfig = new DocumentBuilder() .setTitle('Together') .setDescription('The together API description') .setVersion('1.0') .addBearerAuth({ type: 'http', scheme: 'bearer', name: 'JWT', in: 'header', }) .build(); const swaggerDocument = SwaggerModule.createDocument(app, swaggerConfig); const swaggerCustomOptions: SwaggerCustomOptions = { swaggerOptions: { persistAuthorization: true, }, }; SwaggerModule.setup('swagger', app, swaggerDocument, swaggerCustomOptions);
const port = process.env.BACK_PORT || 9999; await app.listen(port); Logger.log(`Server running on ${port}`);}bootstrap();swaggerConfig
const swaggerConfig = new DocumentBuilder() .setTitle('Together') .setDescription('The together API description') .setVersion('1.0') .addBearerAuth({ type: 'http', scheme: 'bearer', name: 'JWT', in: 'header', }) .build();const swaggerDocument = SwaggerModule.createDocument(app, swaggerConfig);DocumentBuilder 로 swagger 문서를 구성할 수 있고, 메서드로 기본 설정을 해줄 수 있다.
여기서 addBearerAuth 설정은 jwt를 이용한 api를 swagger에서 사용할 수 있게 도와준다.
그리고 SwaggerModule 의 createDocument 함수를 통해 swagger 문서를 생성하게 된다.
참고로 DocumentBuilder 클래스의 함수는 다음과 같다.
DocumentBuilder
import { OpenAPIObject } from './interfaces';import { ExternalDocumentationObject, ParameterObject, SecurityRequirementObject, SecuritySchemeObject, ServerVariableObject } from './interfaces/open-api-spec.interface';export declare class DocumentBuilder { private readonly logger; private readonly document; setTitle(title: string): this; setDescription(description: string): this; setVersion(version: string): this; setTermsOfService(termsOfService: string): this; setContact(name: string, url: string, email: string): this; setLicense(name: string, url: string): this; addServer(url: string, description?: string, variables?: Record<string, ServerVariableObject>): this; setExternalDoc(description: string, url: string): this; setBasePath(path: string): this; addTag(name: string, description?: string, externalDocs?: ExternalDocumentationObject): this; addExtension(extensionKey: string, extensionProperties: any): this; addSecurity(name: string, options: SecuritySchemeObject): this; addGlobalParameters(...parameters: ParameterObject[]): this; addSecurityRequirements(name: string | SecurityRequirementObject, requirements?: string[]): this; addBearerAuth(options?: SecuritySchemeObject, name?: string): this; addOAuth2(options?: SecuritySchemeObject, name?: string): this; addApiKey(options?: SecuritySchemeObject, name?: string): this; addBasicAuth(options?: SecuritySchemeObject, name?: string): this; addCookieAuth(cookieName?: string, options?: SecuritySchemeObject, securityName?: string): this; build(): Omit<OpenAPIObject, 'paths'>;}swaggerOptions
const swaggerOptions: SwaggerCustomOptions = { swaggerOptions: { persistAuthorization: true, },};SwaggerCustomOptions 는 swagger의 상세 설정을 도와준다.
swaggerOptions: { persistAuthorization: true } 은 BearerToken과 관련된 옵션으로, 새로고침을 해도 swagger에 저장한 BearerToken 값이 날아가지 않게 해준다.
참고로 SwaggerCustomOptions 인터페이스는 아래와 같다.
SwaggerCustomOptions
import { SwaggerUiOptions } from './swagger-ui-options.interface';import { OpenAPIObject } from './open-api-spec.interface';export interface SwaggerCustomOptions { useGlobalPrefix?: boolean; explorer?: boolean; swaggerOptions?: SwaggerUiOptions; customCss?: string; customCssUrl?: string | string[]; customJs?: string | string[]; customJsStr?: string | string[]; customfavIcon?: string; customSwaggerUiPath?: string; swaggerUrl?: string; customSiteTitle?: string; validatorUrl?: string; url?: string; urls?: Record<'url' | 'name', string>[]; jsonDocumentUrl?: string; yamlDocumentUrl?: string; patchDocumentOnRequest?: <TRequest = any, TResponse = any>(req: TRequest, res: TResponse, document: OpenAPIObject) => OpenAPIObject;}createDocument & setup
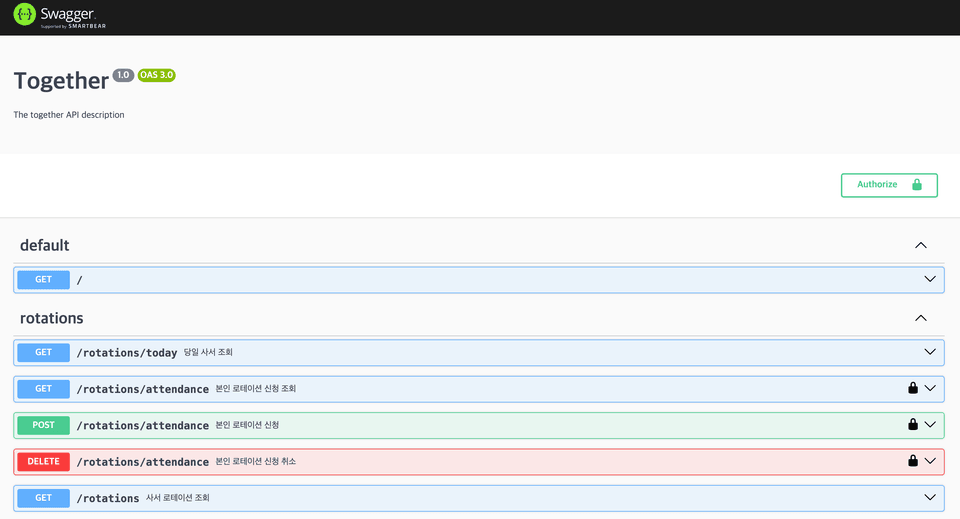
SwaggerModule.setup('swagger', app, swaggerDocument, swaggerCustomOptions);SwaggerModule 의 setup 함수는 swagger ui를 볼 수 있는 path를 설정해준다. 위의 코드는 {백엔드 주소}/swagger 로 들어가면 생성된 swagger 문서를 확인할 수 있다.
NestJS swagger는 기본적으로 Controller 기반으로 api 주소를 맵핑해준다.
하지만 그 외의 request나 response 형태는 데코레이터를 통해 추가로 설정해주어야 한다.
NestJS swagger의 다양한 사용법은 NestJS 공식 문서에서 볼 수 있다.